Mannequin Mayhem - Dev Diary
- Feb 25
- 7 min read
Updated: Apr 25
This is a compilation of my weekly design journal entries for Mannequin Mayhem, a combat design centered project I worked on. Also see Mannequin Mayhem's page on my portfolio.
Week 1
The team met on the 8th to brainstorm a direction for our game. We decided to model our game off of Hades and the Batman Arkham games. From Hades, we would take the top-down perspective, quick movement options, and upgrade system. From the Arkham series we’d take the close-up combat and counters. We also decided to set our game in a mall, with the avatar being a mannequin.

I met with Ethan on the 9th to set up version control through Diversion. I made a little document to help people get set up with Diversion. We get our personal computers set up, we plan to get everyone else set up on Week 2 when we have our computers in the office.
On the 10th and 12th I set up the Gameplay Ability System (GAS). This was a challenge for me, as it involved a lot of technical problems. This was my first time using C++ inside of Unreal, so I had to troubleshoot Unreal, Visual Studio, and Rider. I got the framework implemented and applied to the player character and a base enemy character. Going forward, this will allow us to more easily change what each character can do and will decouple all the abilities (and alleviate some bottlenecking).


Week 2
The team had a meeting on the 16th to get the direction of our game down. We decided to use the gauntlet weapon from Hades as a starting point, basically recreating that basic system. From there, we would iterate on it with our own mechanics. We outlined all the moves in our characters toolkits, and considered the button mapping.

I spent some time refining the movement, taking into consideration the ADSR envelope. I made the character faster, with less time to accelerate and decelerate. I was trying to make the game feel more fast paced, and slightly rigid to convey the feeling of a static mannequin. Decreasing the time the character takes to turn around really helps this feeling, and it will pop into different directions very quickly.
Week 3
I worked on the charge attack for the player. The longer you charge the attack, the larger the hit box and power becomes. Currently this is in the player blueprint, but I plan to move it over to a gameplay ability so enemies can use it also.


Week 4
We had already hit this week's requirements of two distinct attacks, so this week was focused on polish and technical issues. I moved the light attack and heavy attack into their own gameplay abilities. Next I want to get gameplay effects working, so we can add things like status effects and cooldown.

I also did work to differentiate the two attacks. I cut down the animation of the light attack, and made the heavy attack slow down the player’s movement speed.

Week 5
This week I focused on adding polish effects to the attacks. I got my friend to make some VFX for the game, and I implemented them for the heavy attack, light attack and dash. I delved into Gameplay Cues, so that VFX, SFX, and screenshake can be added to individual moves.
I also implemented the gameplay effects system. This will allow the different moves to interact with eachother more. Currently, certain moves will block eachother out so some moves cannot cancel eachother.
Week 6
This week I ran the playtests with 4 people. The main feedback we got was that the quick attack felt unresponsive, it was unclear when you were hitting enemies, and enemies could attack the player too often.

In response to the feedback, I made it more clear when enemies were hit by adding a red flash effect to any enemy that takes damage.
I also edited the animation of the fast attack to make it more responsive. The animation now starts at the apex of the punch, with a trail to give the illusion of the full motion. I also made it so you can cancel out of the animation before it ends.

Week 7
This week I focused on fixing a glitch with knockback and changing the animation of the heavy attack. I reworked how knockback is done. Enemies now turn off collision with other enemies, so they pass through each other when hit. Each attack has its own knockback variable, and each enemy has a knockback resistance variable.


I also changed the animation of the heavy attack to be a spin. This makes more sense for the context of the attack.

Week 8
This week I worked on creating more UI to serve as visual feedback for our moves. I created a decal effect that grows with the charge effect, showing its range increases as you charge it. I also created an effect where damage numbers pop up above enemies heads when they are hit.

Week 9
This week I worked on implementing the upgrade system. Alex created the upgrade items, and I implemented the framework for how those upgrades change the character’s stats. This should help with the power fantasy element of the game, as players will feel themselves get more powerful as they get upgrades.

I also adjusted the charge attack again. You can now move on the release, and it gives multiple hitboxes. This is meant to push the power fantasy by making this attack even more powerful (but you have to work harder to pull it off).

Week 10
This week I focused on further polishing our two attacks. I made the light punch into a two-hit combo. Not only does this make it look better, but it allows for canceling into itself so it comes out faster. I also made the attack weaker. The goal for this attack is to create a rapid fire attack that melts individual enemies.

For the strong attack, I made it so the spin time is affected by how long you charge. If you only charge a little, the attack only hits once. If you charge for its full length, it spins for about 1.5 seconds. The goal for this attack is for the player to find space to charge it up, and then use to to take out large groups of enemies.

Week 11
This week, I added some more flair to push the idea that the characters are mannequins and that the game takes place in a mall. I created a “dismemberment” effect on enemies when they die. Enemies will now spawn a bunch of static meshes of their individual body parts, which scatter around the map. After a few seconds these meshes disappear. To push the effect further, I created a sound cue with a few variations.
I also created an “Exploding Roomba” object. When the Roomba is hit, it will start blinking and make a sound effect. After a few seconds, it will explode and deal massive damage to enemies and the player.

I also created sound cues for a punching “whoosh,” a punch impact, and the dash.

Week 12
I worked on designing the “Hot Topic” level. First, I created a Metrics room where I established some measurements that should be used in level design. This included how narrow corridors can be, how big rooms are, and how tall walls are. I came up with these metrics by seeing how quickly I could move around those spaces, as well as how crowded it becomes when enemies are introduced.


I then made the “Hot Topic” level. I outlined the measurements on paper and completed a blockout of it. I wanted it to feel cramped and crowded (like a real Hot Topic). Finally I added some touches to give it a unique atmosphere. I created a skybox effect with a scrolling emo pattern. I also worked on replicating the dark, warm lighting of Hot Topic.


Week 13
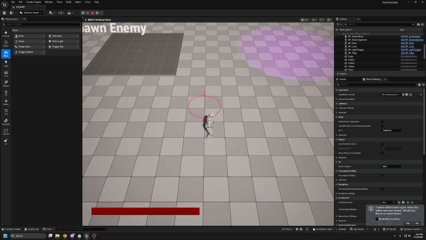
This week I worked on creating the logic for enemy spawns and waves. I created an “Enemy Spawn Point” object, which allows us to designate where enemies will spawn in each level.

I then edited our Enemy Spawner object. The object now has a data table, which it will read and spawn enemies in a certain order. This datatable can be changed based on the level, allowing us to have unique waves of enemies.

Each row in the datatable represents a wave. Each wave has an array of enemies. The spawner will take a wave, run through the array in order, and spawn each enemy at a spawn point. If there are more enemies in a wave than spawnpoints, the spawner will break the wave into “batches” and delay the spawning between batches. This should make enemies trickle into the battlefield naturally. After every enemy in a wave has been killed, the spawner will wait a few seconds and spawn the next wave. After every wave is complete, I plan to have the spawner create an upgrade and open a door.
Week 14
This week I worked on a UI element that indicates how many enemy waves are in the level, and how many enemies have been killed. This helps to add momentum and purpose to combat, and gives the player a clear goal to work towards. I made sure to includes bits of polish, like animating the UI when it changes.

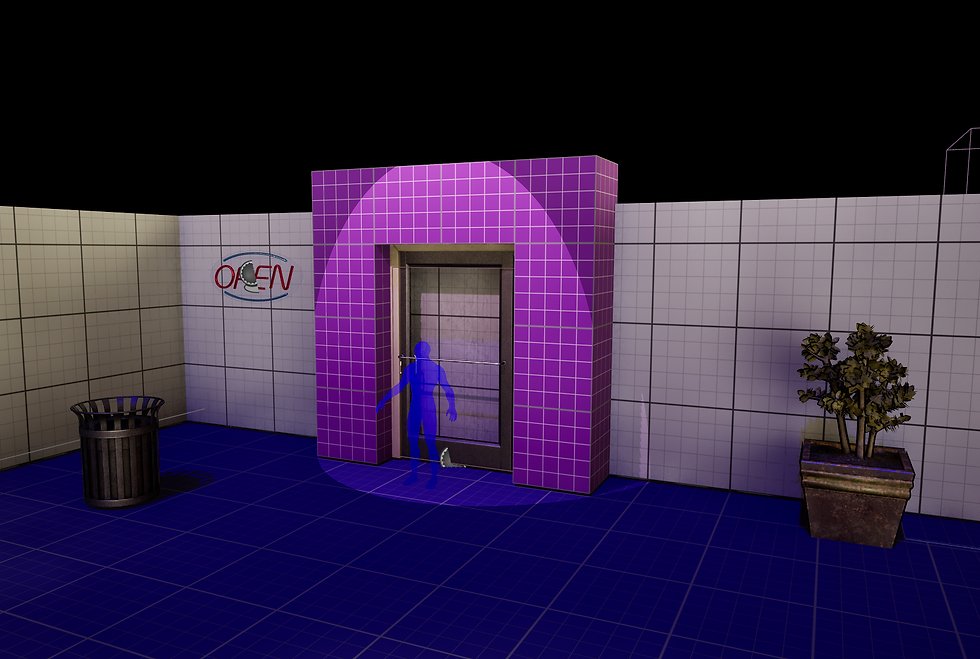
I also worked on linking all our levels together. I edited the door object to be door shaped, and adjusted its position in all levels. I then set up logic to determine when each level was cleared. When a level is cleared, it will save its name in the game instance. The hub world then refers to that game instance and locks doors of rooms that have already been cleared.
I added some polish effects to the hub which also call to the game instance, including spotlights above uncleared rooms and 3 lights above the exit door. Finally, when all 3 rooms are cleared, the exit door unlocks and players can enter to see a victory screen. I finished off by adding a main menu, which takes you to the first level.


Comments